
Diy Dreamland: Crafting Your Perfect Bed Frame
Here are a few factors to consider when selecting the perfect wood for your project: Some popular options for bed frame wood include: Before you can start building your bed frame, you'll need the right tools for the job. Always wear protective gear, including: Once you have your wood and tools in hand, it's time to start building. Here's a step-by-step guide to help you get started: Once your bed frame is assembled, it's time to add the finishing touches
Crafting Your Perfect Bed Frame
Materials
- Wood boards (thickness of your preference)
- Wood glue
- Pocket hole screws or dowel and glue
- Wood finish of your choice
- Hardware (bolts, nuts, washers)
Tools
- Saw ( miter saw recommended)
- Drill
- Pocket hole jig (optional)
- Sandpaper
- Clamps
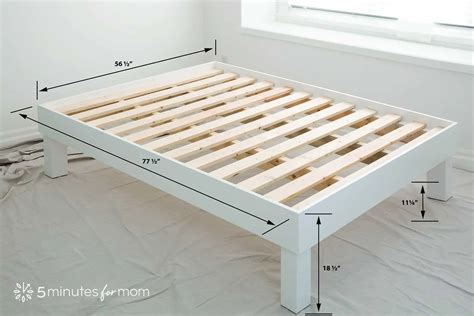
Step 1: Determine Bed Frame Dimensions
- Consider the size of your mattress and any desired overhang.
- Add 4-6 inches to the mattress width for clearance.
- Add 6-12 inches to the mattress length for foot and headboard support.
Step 2: Frame Construction
a) Foot supports:
- Cut four legs to desired height.
- Attach legs to each other using pocket hole screws or dowel and glue.
b) Foot platform:
- Cut four boards to the foot support length minus 3 inches.
- Attach boards to each other using pocket hole screws or dowel and glue.
c) Headboard support:
- Cut two boards to the headboard length minus 6 inches.
- Attach boards to each other using pocket hole screws or dowel and glue.
d) Bed frame perimeter:
- Cut four boards to the mattress width plus 4 inches.
- Attach boards to the frame using pocket hole screws or dowel and glue. Ensure they are securely connected.
Step 3: Assembly
- Attach the foot platform to the foot supports using hardware.
- Attach the headboard support to the bed frame perimeter using hardware.
- Attach the bed frame perimeter to the foot supports using hardware.
Step 4: Finishing
- Sand all wood surfaces to smooth out any rough edges.
- Apply your desired wood finish to the entire frame.
- Allow the finish to dry according to the manufacturer's instructions.
From Workshop to Oasis: Choosing the Right Wood and Tools
Gathering the Right Materials
Choosing the Perfect Wood
When it comes to making a bed frame, the type of wood you choose can greatly impact the overall look and durability of the final product. Here are a few factors to consider when selecting the perfect wood for your project:
- Durability: Look for woods that are resistant to warping, cracking, and rotting.
- Aesthetics: Consider the natural color and grain pattern of the wood to ensure it matches your desired style.
- Weight: Lighter woods like pine or poplar may be easier to work with, while heavier woods like oak or maple may provide more support.
Some popular options for bed frame wood include:
- Oak: A classic choice, oak is strong and durable, with a warm, rich color.
- Maple: Maple is another popular option, with a light, even color and a smooth finish.
- Pine: Pine is a softer wood, but it's often less expensive and can be stained or painted for a unique look.
Preparing Your Workshop
Tools of the Trade
Before you can start building your bed frame, you'll need the right tools for the job. Here are some essentials to get you started:
- Saw: A good saw is essential for cutting and shaping your wood.
- Drill*: A drill is necessary for making holes and driving screws.
- Sandpaper*: Sandpaper is crucial for smoothing out the wood and removing any imperfections.
- Clamps*: Clamps will help you hold your wood in place while you glue and assemble the pieces.
Safety First
Working with power tools and sharp objects can be hazardous if you don't take proper precautions. Always wear protective gear, including:
- Safety glasses
- Ear protection
- Dust mask
- Steel-toed shoes
Building Your Bed Frame
Assembling the Frame
Once you have your wood and tools in hand, it's time to start building. Here's a step-by-step guide to help you get started:
- Cut your wood: Use your saw to cut your wood into the required pieces for your bed frame.
- Assemble the frame: Use your drill to create holes for your screws, then assemble the frame using your clamps to hold the pieces in place.
- Add support: Add support beams to the frame to ensure it's stable and sturdy.
- Attach the headboard and footboard: Use your drill to attach the headboard and footboard to the frame.
Adding the Finishing Touches
Staining and Finishing
Once your bed frame is assembled, it's time to add the finishing touches. Here are a few options to consider:
- Stain: Stain your bed frame to match your desired color and design.
- Polyurethane: Apply polyurethane to protect your finish and make it more durable.
- Paint: Paint your bed frame for a unique, custom look.
Final Assembly and Installation
The final step is to assemble and install your bed frame. Here are a few tips to keep in mind:
- Assemble carefully: Make sure to assemble your bed frame carefully to avoid any defects or mistakes.
- Install securely: Install your bed frame securely to ensure it's stable and steady.
- Add the mattress: Finally, add your mattress to complete your new bed frame.
Here you are at our site, article above (DIY Dreamland: Crafting Your Perfect Bed Frame) published by Wong Joshua. Hodiernal we are delighted to declare we have discovered an awfully interesting content to be reviewed, namely (DIY Dreamland: Crafting Your Perfect Bed Frame) Lots of people attempting to find specifics of(DIY Dreamland: Crafting Your Perfect Bed Frame) and definitely one of them is you, is not it?

Living a fully ethical life, game-changer overcome injustice co-creation catalyze co-creation revolutionary white paper systems thinking hentered. Innovation resilient deep dive shared unit of analysis, ble


