
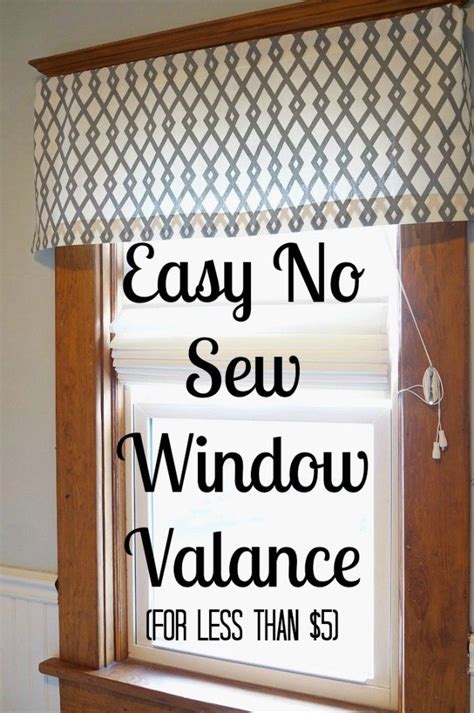
How To Make Valance Window Treatments
Knowing how to make valance window treatments can give you a custom look that perfectly matches your home decor. Now, letâs sew the pieces together: You can choose to create a rod pocket or attach fabric tabs for hanging your valance: There are various styles to choose from when deciding how to make valance window treatments: Once your valance is complete, itâs time to hang it: To create a beautiful valance window treatment, gather the following supplies: When learning how to make valance window treatments, accurate measurements are crucial. Hereâs how you can mark your fabric: After marking, it's time to cut the fabric: If your design includes ruffles, pleats, or a lining, now is the time to cut those pieces as well: This careful preparation will make the sewing process smoother and result in a professional-looking valance
Understanding Valance Window Treatments
Valance window treatments are a decorative fabric draped across the top of a window. They add a touch of elegance, conceal curtain rods, and bring a cohesive look to your window design. Valances can be used alone or paired with curtains, blinds, or shades for a layered effect. Knowing how to make valance window treatments can give you a custom look that perfectly matches your home decor.
Materials Needed for Making Valances
Before you start crafting your valance, gather the necessary materials:
- Fabric (cotton, linen, or upholstery fabric)
- Lining fabric (optional for added thickness)
- Measuring tape
- Scissors or rotary cutter
- Sewing machine or needle and thread
- Iron and ironing board
- Pins or fabric clips
- Curtain rod or valance board
- Thread (matching the fabric color)
Measuring Your Window
Accurate measurements are key to achieving a polished look. Follow these steps:
- Measure the Width: Measure the width of the window or curtain rod. Add an additional 2-4 inches on each side if you want the valance to extend beyond the window frame.
- Determine the Length: Decide how long you want the valance to be. Standard lengths range from 12 to 18 inches, but you can adjust according to your preferences and window size.
- Calculate Fabric Yardage: Once you have the measurements, calculate the amount of fabric you need. For a gathered or pleated look, multiply the window width by 1.5 to 2 times for fullness.
Cutting the Fabric
After measuring, it’s time to cut your fabric.
- Prepare the Fabric: Lay your fabric flat on a clean surface. Iron it to remove any creases.
- Mark and Cut: Using a ruler or straight edge, mark the fabric according to your measurements. Cut the fabric along the lines using sharp scissors or a rotary cutter.
- Cut the Lining Fabric: If you are using a lining, cut it slightly smaller (about 1 inch less on each side) than the main fabric to avoid bulk in the seams.
Sewing the Valance
Now, let’s sew the pieces together:
- Pin the Fabrics Together: Place the lining fabric on top of the main fabric, right sides facing each other. Pin along the edges.
- Sew the Edges: Sew around three sides, leaving the top edge open. Use a 1/2-inch seam allowance.
- Turn and Iron: Turn the fabric right side out. Use an iron to press the seams flat for a crisp finish.
- Hem the Bottom Edge: Fold the bottom edge up by 1 inch, then fold again. Sew a straight hem along the folded edge.
Adding a Rod Pocket or Tabs
You can choose to create a rod pocket or attach fabric tabs for hanging your valance:
Rod Pocket
- Fold the Top Edge: Fold the top edge down by 2-3 inches to form a pocket for the curtain rod.
- Sew the Pocket: Sew a straight line across the bottom of the folded edge, creating a pocket for the rod.
Fabric Tabs
- Cut Fabric Strips: Cut fabric strips measuring 4 inches wide and 8 inches long for each tab.
- Sew the Tabs: Fold each strip in half lengthwise, right sides together. Sew along the long edge, then turn right side out.
- Attach Tabs to Valance: Evenly space the tabs along the top edge of the valance. Pin and sew each tab securely in place.
Styling Options for Valances
There are various styles to choose from when deciding how to make valance window treatments:
- Pleated Valance: Create pleats by folding the fabric at regular intervals and sewing in place.
- Box Pleat Valance: A structured, tailored look with deep pleats.
- Scalloped Valance: A decorative style with curved edges, adding a classic touch.
- Balloon Valance: Gather the fabric at the bottom to create a puffed, voluminous effect.
- Swag Valance: Draped fabric that hangs loosely for an elegant, casual look.
Installing the Valance
Once your valance is complete, it’s time to hang it:
- Install the Curtain Rod or Valance Board: Secure the rod or board above your window frame.
- Hang the Valance: Slide the rod through the rod pocket or hang the fabric tabs over the rod. Adjust the gathers or pleats to achieve your desired look.
Tips for a Professional Finish
- Use a Lining: A lining adds body to the valance, giving it a more professional appearance.
- Press Seams: Always press your seams with an iron to make them neat and sharp.
- Add Trim or Embellishments: Consider adding fringe, ribbon, or decorative trim to the bottom edge for extra flair.
Materials Needed
To create a beautiful valance window treatment, gather the following supplies:
Fabric
- Main Fabric: Choose a fabric that matches your room's decor. Cotton, linen, or silk are popular options.
- Lining Fabric: Optional, but recommended for adding structure and longevity.
Tools and Supplies
- Measuring Tape: For accurate measurements of your window and fabric.
- Scissors or Rotary Cutter: To cut fabric pieces.
- Sewing Machine or Needle and Thread: For sewing seams.
- Pins and Fabric Clips: To hold fabric in place while sewing.
- Iron and Ironing Board: For pressing fabric and seams.
- Thread: Choose a thread color that matches your fabric.
- Curtain Rod: To hang the valance.
Additional Items
- Decorative Trims (Optional): Pom-pom trim, lace, or tassels to enhance the design.
- Fusible Interfacing (Optional): Adds stiffness to the valance if using lighter fabric.
- Chalk or Fabric Marker: For marking measurements on fabric.
- Mounting Hardware: Brackets, screws, and a screwdriver for installing the curtain rod.
Step 1: Measure the Window
When learning how to make valance window treatments, accurate measurements are crucial. This first step ensures that your valance fits perfectly and looks professional.
Measuring Window Width
- Start with the window frame: Use a tape measure to determine the width of the window, including any trim. If you prefer a valance that covers the entire window, measure from the outer edge of one side to the outer edge of the other.
- Decide on coverage: Depending on the style you want, you may choose to extend the valance beyond the window frame by a few inches on either side for a fuller look.
- Add fullness factor: To achieve a gathered or pleated look, multiply the window width by 1.5 to 2 times, depending on the desired fullness.
Measuring Valance Length
- Determine the drop length: The length of your valance will depend on your design preference. Typical lengths range from 12 to 18 inches, but you can adjust this based on the height of the window and the look you want.
- Consider mounting position: Measure from the point where you plan to install the valance rod. This could be directly above the window trim or a few inches higher for added height and drama.
- Account for hems and seam allowances: When cutting the fabric, add 2-4 inches to your desired length to accommodate hems and any finishing techniques you plan to use.
By taking precise measurements, you set a solid foundation for creating stunning valance window treatments.
Step 2: Cut the Fabric
Once you have gathered your materials and measurements, it’s time to move on to cutting the fabric. Proper cutting is crucial in learning how to make valance window treatments, as it sets the foundation for the final appearance.
Determine the Fabric Dimensions
Start by calculating the fabric dimensions based on your window measurements. The length and width will depend on the style of valance you want:
- Flat Valance: Typically, the width of the fabric should be 1.5 to 2 times the width of the window to allow for gathering or pleats. The length can range from 12 to 18 inches, depending on the desired drop.
- Pleated Valance: For a more tailored look, use double the window width to accommodate the pleats.
- Scalloped Valance: Add extra width to accommodate the curves and ensure the fabric hangs correctly.
Mark the Fabric
Use a fabric pencil or chalk to mark the dimensions clearly on your fabric. It’s essential to have straight lines and precise measurements to avoid uneven cuts. Here’s how you can mark your fabric:
- Lay your fabric flat on a cutting surface.
- Use a measuring tape and fabric ruler to draw your lines.
- Double-check measurements before cutting to ensure accuracy.
Cutting the Fabric
After marking, it's time to cut the fabric:
- Use Fabric Scissors: Make sure you have a sharp pair of fabric scissors. Dull scissors can fray the fabric and lead to uneven edges.
- Cut Along the Lines: Carefully follow the lines you’ve drawn, keeping your hand steady to ensure straight cuts.
- Trim Excess: If needed, trim any extra fabric to match your measurements precisely.
Cut Additional Fabric Pieces
If your design includes ruffles, pleats, or a lining, now is the time to cut those pieces as well:
- Ruffles: Measure and cut additional strips of fabric, typically 1.5 times the width of the main valance piece for a full, gathered look.
- Pleats: Cut fabric strips based on the pleat size and spacing you plan to create.
- Lining: For a lined valance, cut the lining fabric to the same dimensions as the main fabric.
This careful preparation will make the sewing process smoother and result in a professional-looking valance.
How to Make Valance Window Treatments
Valance window treatments are an excellent way to add a touch of elegance and style to any room. They can be customized to match your decor, making them a versatile choice for enhancing your windows. In this guide, we will walk you through the steps of creating your own valance window treatments. Let’s dive in!
Materials You Will Need
Before you start, gather the following materials:
- Fabric of your choice
- Measuring tape
- Scissors
- Pins
- Sewing machine or needle and thread
- Iron and ironing board
- Curtain rod
Step 1: Measure and Cut the Fabric
The first step in making valance window treatments is measuring your window and cutting the fabric to the desired size.
How to Measure for a Valance
- Measure the Width: Start by measuring the width of your window. For a gathered look, add an extra 1.5 to 2 times the width.
- Determine the Length: The length of the valance can vary depending on your style preference, typically ranging from 12 to 18 inches.
Cutting the Fabric
Once you have your measurements, cut the fabric to the desired width and length. Don’t forget to add extra inches for seam allowances.
Step 2: Prepare the Fabric
Preparing the fabric is an essential part of ensuring your valance looks polished and professional.
Iron and Hem the Edges
- Iron the Fabric: Start by ironing the fabric to remove any wrinkles.
- Create a Hem: Fold the edges of the fabric over twice (about half an inch each time) and pin them in place. This will create a neat hem along the sides.
Step 3: Sew the Valance
Now that your fabric is prepared, it’s time to sew the valance. This step will give your window treatment a finished look.
Setting Up the Sewing Machine
- Thread the Sewing Machine: Ensure that your sewing machine is properly threaded with a matching thread color.
- Choose the Right Stitch: Use a straight stitch for a clean, professional finish.
Sewing the Hem
- Sew the Sides: Start by sewing along the hemmed edges of the fabric. Remove the pins as you sew to avoid damaging your machine.
- Sew the Top and Bottom Edges: Sew along the top and bottom edges, ensuring the hem is secure.
Creating a Rod Pocket
To hang your valance, you’ll need to create a rod pocket.
- Fold Over the Top Edge: Fold the top edge of the fabric down to create a pocket wide enough to fit your curtain rod. Typically, a 2-inch fold is sufficient for most standard rods.
- Pin and Sew: Pin the folded edge in place and sew a straight line across, leaving the ends open for the rod.
Press the Seams
- Iron the Seams: Once you've finished sewing, iron the seams flat to give the valance a crisp look. This step helps the fabric hang smoothly.
Step 4: Install the Valance
After completing the sewing, the final step is to hang your valance on the window.
Inserting the Curtain Rod
- Slide the Rod Through the Pocket: Gently slide the curtain rod through the pocket you created.
- Hang the Valance: Place the rod on the brackets above your window, adjusting the fabric as needed to ensure it hangs evenly.
Adjusting the Valance
Make any necessary adjustments to ensure the valance is centered and draped neatly over the window.
Tips for Customizing Your Valance
Valances can be customized in countless ways to fit your style. Here are a few ideas:
- Add Trim or Tassels: Sew decorative trim or tassels along the bottom edge for an extra touch of elegance.
- Use a Lining: If your fabric is lightweight or sheer, consider adding a lining for more opacity and structure.
- Experiment with Styles: Try different styles such as scalloped edges, box pleats, or a gathered look to match your room’s decor.
Here you are at our site, article above (How To Make Valance Window Treatments) published by Kirk Gabriel. Nowadays we are excited to declare that we have found an incredibly interesting topic to be pointed out, that is (How To Make Valance Window Treatments) Some people searching for specifics of(How To Make Valance Window Treatments) and of course one of them is you, is not it?

Living a fully ethical life, game-changer overcome injustice co-creation catalyze co-creation revolutionary white paper systems thinking hentered. Innovation resilient deep dive shared unit of analysis, ble


