
Elevate Your Home Decor With These Free Sideboard Woodworking Plans
A sideboard can be that perfect blend of storage and style, and with the right sideboard woodworking plans, you can build one yourself! Choosing the right sideboard woodworking plans can be the key to creating that perfect piece for your home. If you're ready to take your sideboard woodworking plans to the next level, this article will guide you through the process of working with crown molding, providing expert tips and tricks along the way.
Elevate Your Home Decor with These Free Sideboard Woodworking Plans
Ready to add a touch of handcrafted elegance to your living space? A sideboard can be that perfect blend of storage and style, and with the right sideboard woodworking plans, you can build one yourself! Forget those generic store-bought pieces; imagine the pride of creating a unique, functional statement for your home. It's not just about having furniture; it’s about having something you made with your own two hands.
Why Build Your Own Sideboard?
Building furniture yourself gives you control. You're not limited by what’s available in stores. Maybe you need a particular size to fit a snug corner, or maybe you're after a very specific style—a sleek modern look, or something with a rustic feel. Also, let's face it, you can save some money while having a high-quality, solid wood piece that will last for many years. The satisfaction of saying "I built that!" is simply priceless.
Choosing the Right Plans
Finding the perfect sideboard woodworking plans is the first step. There are numerous options online. You should take a look at your experience level before committing. Some plans are beginner-friendly, using basic joinery, while others involve more complex techniques. If you're new to woodworking, starting with a simpler design is the better approach. You'll still end up with an amazing piece!
Gathering Your Materials and Tools
After finding some plans that fit, it's time for the fun part. Look for quality wood, considering species, grain patterns, and cost. You’ll also need fasteners like screws or dowels, and the necessary finishing products such as stain, paint, or varnish. Tools depend on the plan you choose. Essential ones could be a saw, sander, drill, and a measuring tape. Remember safety gear! Eye protection and dust masks are super important when woodworking.
Customizing Your Sideboard
With a solid base from your woodworking plan, you're free to make it your own. Want to add a pop of color? Go for it! Or maybe some unique hardware like sleek modern handles or antique-inspired pulls. The design is just a guide; there's no limit on your own artistic touches. Think of it as a chance to let your own personal style shine.
Finishing Touches
The finish can make a world of difference. Sanding and applying several coats of your finish of choice will not only protect the wood but enhance its look. A good finish can elevate your project to the next level and really make your sideboard a showpiece. Take your time, let each coat dry fully, and you will see the transformation.
Enjoying Your Handcrafted Piece
Finally, with all the steps completed, your beautiful, custom-made sideboard is ready to take its place in your home. This isn’t just another piece of furniture; it's a testament to your time, effort, and creativity. Every time you see it, you can feel proud of what you’ve achieved.
From Simple to Sophisticated: 10 Sideboard Designs to Suit Every Style
Looking to build a sideboard but unsure where to begin? The options can seem endless! Choosing the right sideboard woodworking plans can be the key to creating that perfect piece for your home. Whether your style is minimalist, rustic, or somewhere in between, there are designs out there to suit every taste and skill level. Let's explore some ideas to get you inspired!
Minimalist Modern
Clean lines and a focus on function are the cornerstones of minimalist design. A simple, rectangular sideboard with a smooth finish would blend seamlessly with a modern interior. Look for plans that feature flat panels, hidden hardware, and perhaps a simple push-to-open mechanism instead of handles. These designs tend to be straightforward to build but still make a significant impact.
The Scandi-Inspired Sideboard
Think light-colored woods like birch or maple, combined with a simple, geometric form. Tapered legs are a classic element in Scandinavian design. This type of sideboard woodworking plans often involves basic joinery, making it a good option for beginner woodworkers. It's all about creating a calming, uncluttered feel.
Sleek and Contemporary
For a more sophisticated take on modern design, consider a sideboard with darker woods like walnut or ebony. Incorporating elements like metal accents or glass doors could add an extra touch of elegance. These designs can be a bit more challenging, requiring precision cuts and more complex assembly techniques.
Rustic Charm
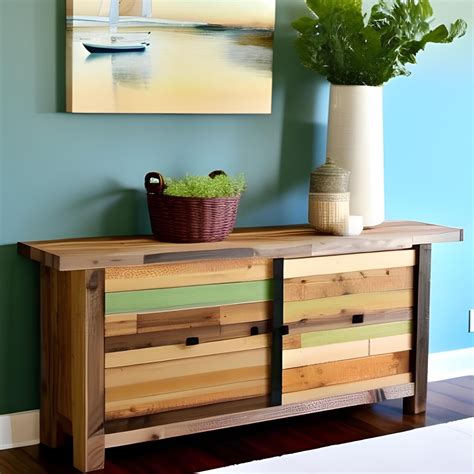
If you're drawn to warm, inviting spaces, a rustic sideboard might be just the thing. Reclaimed wood, distressed finishes, and chunky hardware are hallmarks of this style. Sideboard woodworking plans for rustic pieces often emphasize the natural beauty of the wood.
Farmhouse Flair
Picture a sideboard with barn door-style panels or a milk-painted finish. Exposed hinges and simple wooden knobs further enhance the farmhouse feel. These builds can be quite forgiving, as imperfections add to the overall character. They often feature wider boards for a substantial look.
Industrial Edge
Combine wood with metal for a rugged, industrial feel. Think pipe legs or metal mesh doors. The key is to mix natural and manufactured materials. This offers a bold statement, that works well in loft apartments or any space looking for that urban style. These might involve more specific hardware considerations.
Eclectic & Unique
Not afraid to break the rules? Embrace your individuality with a sideboard that reflects your unique style. Look for sideboard woodworking plans that challenge the norm.
Mid-Century Modern
Think angled legs, tambour doors, and a rich, warm wood tone. Mid-century modern sideboards are full of character. These might have more elaborate joinery details that can add interest to the build.
The Art Deco Statement
Geometric patterns, high-gloss finishes, and metallic accents are the hallmarks of art deco style. A sideboard in this style is a true statement piece. These designs often call for more precision work and detailed embellishments.
Classic Elegance
For a timeless look, consider a sideboard with classic proportions and refined details. Often, this means darker woods, panel doors, and classic hardware.
Traditional Beauty
Simple panel doors, elegant legs, and a smooth finish are the features here. Look for designs with crown molding or detailed trim. These sideboards have a timeless feel that works with any traditional decor. The build may call for more traditional woodworking skills.
The Shaker Style
Shaker sideboards are known for their simplicity and functionality. Clean lines, flat panels, and minimalist hardware are key elements. This style is beautiful in its simplicity. It’s straightforward, yet classic.
Exploring these various design styles gives you a sense of the possibilities. The right sideboard woodworking plans are out there, waiting for you to bring them to life. Choose one that reflects your home and personal preferences, and get ready to enjoy your handcrafted masterpiece.
Get Started with These Easy-to-Follow Sideboard Woodworking Plans for Beginners
Embarking on a woodworking project can feel daunting, especially if you're just starting out. But with the right sideboard woodworking plans, even a novice can create a beautiful and functional piece of furniture. This article focuses on projects that are specifically designed for beginners, making the process less intimidating and more rewarding. Let's dive into some options perfect for getting your feet wet in the world of woodworking.
Why Choose Beginner-Friendly Plans?
When you're new to woodworking, the goal is to learn the basics without getting overwhelmed. Beginner-friendly sideboard woodworking plans focus on simplicity, using straightforward joinery techniques and readily available materials. These designs tend to have fewer complex steps, making the build process smoother and more enjoyable. They're also a great way to gain confidence and learn new skills.
Focusing on Fundamental Techniques
The best beginner plans utilize techniques like butt joints, screws, and glue, which are easy to master. You might also see dowels for extra support, which is another fundamental technique. The emphasis is on accuracy and precision, learning to cut straight, measure accurately, and assemble pieces correctly. These skills are building blocks for more complex projects down the road.
Understanding Material Choices
Beginner plans will often recommend easily accessible and affordable materials, such as pine or plywood. These woods are forgiving and cost-effective, allowing you to practice without worrying about expensive materials. As you become more comfortable, you can move to more complex wood choices.
Exploring Simple Sideboard Designs
Now let's look at some specific types of beginner-friendly sideboard plans. These are designed to introduce you to the fundamentals of furniture making without requiring specialized tools or expertise.
The Basic Box Sideboard
This is a very simple rectangular shape. It uses standard size pieces of wood cut in a rectangular configuration. The construction is all about straight cuts, screws, and wood glue. It's an excellent way to learn how to create a solid, stable structure. This style will often include a simple set of doors or drawers for storage.
Sideboard with Simple Legs
Adding legs to your basic box is the next step. A beginner plan might use pre-made wooden legs that can simply be attached. The legs might be made of simple cuts of wood to which you would attach the box structure. This project introduces the idea of balancing aesthetics with structural integrity. The plan will guide you through attaching them securely.
The Open Shelf Sideboard
This design ditches the doors and drawers for open shelves. The main structure may be similar to the box sideboard, however with a shelving configuration. This design highlights the use of wood joinery and is great for displaying decor. This plan will help you get used to planning and cutting boards accurately.
Essential Tools for Beginner Projects
Before diving into any sideboard woodworking plans, it’s important to make sure you have the right tools. Start with these basic items:
Measuring and Marking Tools
Accurate measurements are key to success. A measuring tape, square, and pencil are essential. These simple tools will help you mark precise cuts and assemble pieces correctly.
Cutting Tools
A basic saw will suffice for the cuts. Depending on the thickness of the wood, you might also consider an electric jigsaw for those thicker cuts. Even a handsaw is a great option for beginning woodworkers to help with accuracy and precision.
Fastening Tools
A power drill/driver is ideal for screwing pieces together. You’ll also need a set of bits for drilling pilot holes. Screws are often the simplest way to hold pieces together for beginners.
Sanding Tools
Sanding is important for smooth surfaces. Sandpaper and a sanding block can get you started. An electric sander can speed things up but isn’t necessary when you are getting started.
Tips for Success
As you work through your sideboard woodworking plans, keep these tips in mind for a smoother and more enjoyable experience:
Take Your Time
Woodworking is not a race. Rushing can lead to mistakes and frustration. It’s better to take your time, measure carefully, and double-check each step.
Always Follow Safety Precautions
Safety first! Wear safety goggles and a dust mask when cutting and sanding. Make sure your work area is well-lit and ventilated.
Start Simple, Build Confidence
Don't be afraid to start with the most basic design. As you gain confidence and skills, you can tackle more complex projects. The most important thing is to have fun and enjoy the process! The more you do it, the better you will become.
Expert Tips and Tricks for Building a Stunning Sideboard with Crown Molding
Elevating your woodworking projects often means incorporating advanced techniques, and crown molding is a classic way to add a touch of sophistication. If you're ready to take your sideboard woodworking plans to the next level, this article will guide you through the process of working with crown molding, providing expert tips and tricks along the way. Crown molding can seem intimidating, but with the right approach, it can transform a simple piece into something spectacular.
Why Add Crown Molding?
Crown molding isn't just for aesthetics; it also adds a finished look to your woodworking projects. It creates a smooth transition between the top of your sideboard and the ceiling, adding visual interest and architectural detail. When incorporated properly, crown molding can give your custom sideboard a polished, high-end appearance. It shows you paid attention to detail, which is the mark of a well crafted piece.
Enhancing Visual Appeal
Adding crown molding to your sideboard woodworking plans can enhance the overall design, giving it a more substantial and refined presence. It also creates a beautiful focal point, drawing the eye upwards. The right style of crown molding can complement your overall design, adding to the uniqueness of your piece.
Covering Imperfections
Crown molding can be a great way to hide minor imperfections or gaps where different pieces of wood come together. This can be a lifesaver if you're not quite perfect in your cuts, or if you've had some movement in the wood. It can help to create a seamless look, that otherwise might be too difficult to achieve.
Selecting the Right Crown Molding
Choosing the right crown molding for your project can impact its final look. Consider these factors when making your selection.
Material
Crown molding is typically made from wood, MDF (medium-density fiberboard), or polyurethane. Wood is a classic choice but can be more expensive and requires more skill to install. MDF is a more affordable option, is easy to work with, and paints well. Polyurethane is waterproof and suitable for humid environments. Each material has its own advantages and disadvantages, so choose based on your budget and skill level.
Style
Crown molding comes in various styles, from simple and modern to ornate and traditional. Consider your sideboard's overall design when selecting a style. A simple, flat profile might be best for modern designs, while a more detailed profile might complement traditional styles. Ensure the style complements your sideboard woodworking plans so the molding will add to the aesthetics, instead of taking away from the piece.
Size
The size of your crown molding is an important factor. Choose a size that's proportionate to your sideboard. Crown molding that is too small may appear insignificant. Too large may overpower the project. A good guideline is to aim for a profile that is roughly one-third to one-quarter the height of your sideboard.
Mastering the Art of Installation
Proper installation is essential for a professional-looking finish. Here are some tips to help you succeed.
Measuring and Cutting
Accurate measurements are crucial when working with crown molding. Use a miter saw to make precise angled cuts. Remember the saying "measure twice, cut once." Make sure to practice on scrap pieces first before cutting into your expensive crown molding.
Coping vs. Mitering
For inside corners, you have two main options: coping or mitering. Coping involves cutting one piece of molding at a 90-degree angle and then shaping the end of the second piece to fit perfectly against it. Mitering involves cutting both pieces at 45-degree angles and joining them together. Coping is often preferred for non-perfect walls, as it can hide imperfections more effectively. Mitered corners look better when they are perfect and may be faster for some people to achieve.
Securing the Molding
Use construction adhesive and small finish nails to secure your crown molding. Make sure the nails go into solid wood. Avoid nailing into MDF alone. Fill any nail holes with wood filler, sand smooth, and then paint or stain the molding to match your sideboard. Secure each piece of the molding as you go, ensuring there are no gaps in the fit.
Adding the Final Touches
After the crown molding is installed, consider these final steps to ensure a polished finish:
Caulking
Use caulk to fill any small gaps between the crown molding and the sideboard. This will create a seamless look. When applying caulk, do so in smooth, even lines, and immediately use a wet finger or sponge to smooth it. This will ensure that the caulk won't be visible after it has dried.
Painting and Staining
After all of the steps have been completed, paint or stain your crown molding and any exposed wood. Use a high-quality wood primer and paint to achieve a smooth finish. For a stained finish, use a wood conditioner first to get a more uniform stain. Take your time with this process, and allow each coat to dry before moving to the next.
Adding Your Personal Touch
While the steps can be followed closely, these plans allow you to add a personal touch by choosing your own color and hardware. It’s that personal touch that will make it truly yours.
Summary of "Elevate Your Home Decor with These Free Sideboard Woodworking Plans"
This article emphasizes the advantages of building your own sideboard using free sideboard woodworking plans. It highlights how this allows for customization in size and style, cost savings, and the personal satisfaction of creating handcrafted furniture. The article guides readers through choosing the right plans, gathering necessary materials and tools, and customizing their builds. It stresses the importance of selecting the right plans according to skill level, gathering quality materials, and taking time with finishing touches like sanding and applying varnish. It encourages readers to personalize their sideboards and take pride in their creations.
Frequently Asked Questions (FAQs)
Q: Where can I find free sideboard woodworking plans?
A: There are many online resources that offer free sideboard woodworking plans. A simple internet search can lead you to various websites and forums where you can download plans in different styles and skill levels. Be sure to check reviews or comments to ensure the plans are well-written and accurate.
Q: What kind of woodworking skills do I need to build a sideboard?
A: The skills required will depend on the specific sideboard woodworking plans you choose. Some plans are designed for beginners and use basic techniques, while others may be more advanced. It's wise to assess your experience level and start with a plan that matches your current skills. Beginner projects typically involve basic joinery, and the use of screws and glue.
Q: What tools and materials will I need?
A: Common tools include a saw, sander, drill, measuring tape, and safety gear like eye protection and dust masks. Material-wise, you will need wood (the type depends on your plan), fasteners such as screws or dowels, and finishing products like stain, paint, or varnish. The exact list of tools and materials will vary based on the complexity of your chosen sideboard woodworking plans.
Q: Can I customize the sideboard to match my decor?
A: Absolutely! One of the biggest advantages of building your own sideboard is the ability to customize it. After you have followed your sideboard woodworking plans, you can paint, stain, or add unique hardware to create a look that perfectly complements your home's decor. Don't be afraid to be creative with these personal touches.
Q: How long does it take to build a sideboard?
A: The timeline for building a sideboard depends on several factors, including the complexity of the plans, your woodworking experience, and the time you can dedicate to the project. A simpler beginner sideboard might take a weekend, while more complex designs could require a few weeks. It’s important to factor in drying times for stains or varnish into your overall timeframe.
Q: Is building a sideboard cheaper than buying one?
A: In many cases, yes. Building your own sideboard using sideboard woodworking plans can be more cost-effective than buying a similar piece of furniture from a store. However, keep in mind that costs can fluctuate, especially for high-quality materials and specialized hardware. The satisfaction of building your own piece will add to the value of the project.
Here you are at our website, content above (Elevate Your Home Decor With These Free Sideboard Woodworking Plans) published by Gill Mohammed. Nowadays we are delighted to declare we have discovered an extremely interesting topic to be pointed out, namely (Elevate Your Home Decor With These Free Sideboard Woodworking Plans) Many individuals looking for information about(Elevate Your Home Decor With These Free Sideboard Woodworking Plans) and of course one of them is you, is not it?

Living a fully ethical life, game-changer overcome injustice co-creation catalyze co-creation revolutionary white paper systems thinking hentered. Innovation resilient deep dive shared unit of analysis, ble


