
Crafting Your Dream Space: A Step-By-Step Guide To Building A Sideboard
Here are the steps to take: Once you have planned your project, it's time to gather the necessary materials and tools: Now that you have your materials and tools, it's time to start building: Once you have constructed the sideboard, it's time to finish it: Before diving into the world of sideboard design, it's essential to understand your personal aesthetic. Now that you have a design plan in place, it's time to start building your sideboard. Keep the following in mind: Proper preparation of your workspace and materials helps in safe and efficient completion of the build process: Assembling the sideboard frame is the foundation of the entire build process: Once the sideboard is assembled, you must finish it with your chosen material and install it in the designated location: Adding a Touch of Personality: Tips and Tricks for Upgrading Your Sideboard with Unique Finishes and Decor A sideboard is more than just a piece of furniture to store your dining essentials
Crafting Your Dream Space: A Step-by-Step Guide to Building a Sideboard
=
Planning Your Project
Before you start building, it's essential to plan your project carefully. Here are the steps to take:
Understanding the Purpose
- Determine the size and shape of your sideboard based on your available space and desired functionality.
- Consider the style and theme you want to achieve in your home or office.
Defining the Budget
- Set a realistic budget for your project, including the cost of materials, tools, and any necessary professional services.
- Determine how much you are willing to spend and stick to it.
Gathering Materials and Tools
Once you have planned your project, it's time to gather the necessary materials and tools:
Essential Tools
- Table saw or circular saw for cutting lumber
- Drill press or portable drill for drilling holes
- Sander for smoothing wood surfaces
- Measuring tape for measuring accurately
- Clamps for holding pieces in place
Essential Materials
- High-quality wood for the sideboard's shelves and frame
- Wood glue for bonding wood pieces together
- Wood filler for filling gaps and holes
- Paint or stain for finishing the sideboard's surface
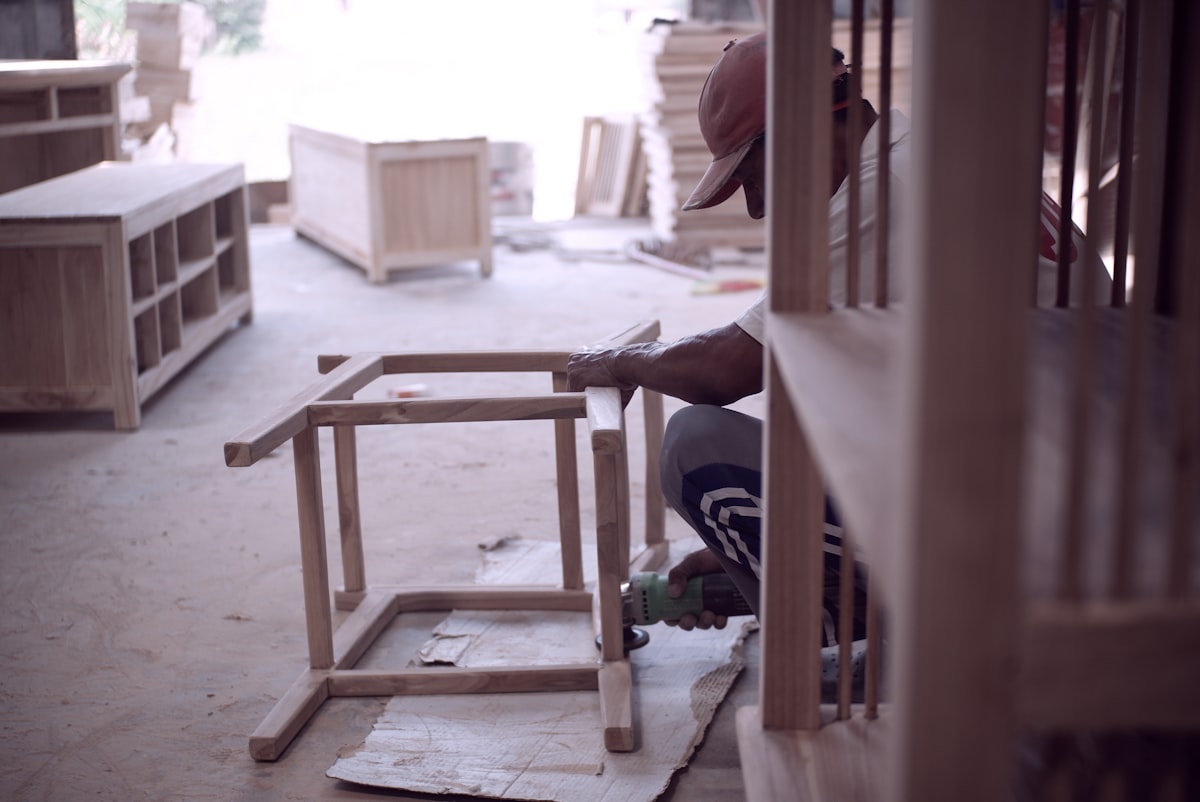
Constructing the Sideboard
Now that you have your materials and tools, it's time to start building:
Assembling the Frame
- Cut the lumber to the required sizes for the sideboard's frame using a table saw or circular saw.
- Assemble the frame using wood glue and nails or screws.
- Use clamps to hold the pieces in place while the glue dries.
Creating the Shelves
- Cut the lumber to the required sizes for the sideboard's shelves using a table saw or circular saw.
- Sand the shelves to smooth out any rough edges or splinters.
- Use wood glue and nails or screws to attach the shelves to the frame.
Finishing the Sideboard
Once you have constructed the sideboard, it's time to finish it:
Applying a Finish
- Sand the sideboard to smooth out any imperfections.
- Apply a coat of paint or stain to the sideboard's surface.
- Allow the finish to dry completely before applying additional coats.
Adding Final Touches
- Attach any hardware or trim to the sideboard as desired.
- Install any glass or other materials that require professional installation.
- Stand back and admire your finished sideboard!
How to Build a Sideboard: Safety Reminders
- Always wear safety goggles and a dust mask when working with power tools.
- Keep loose clothing and long hair tied back when working with power tools.
- Follow all manufacturer instructions for the use of power tools and materials.
- Keep children and pets away from the work area.
Tips and Variations
- Consider using a different type of wood or stain to create a unique look.
- Add decorative trim or molding to give your sideboard a more elaborate design.
- Experiment with different shapes and sizes to create a truly one-of-a-kind sideboard.
From Design to Reality: Choosing the Perfect Style for Your Sideboard
Understanding Your Design Aesthetic
Before diving into the world of sideboard design, it's essential to understand your personal aesthetic. Take a moment to think about the style and look you want to achieve in your home. Do you prefer modern and sleek or traditional and ornate? Are you drawn to bold colors or soft, calming hues?
Popular Types of Sideboards
Modern Sideboards
Modern sideboards are a great choice for those who desire a clean and minimalist look. characterised by their simplicity and lack of ornamentation, modern sideboards often feature straight lines, low profiles, and a focus on functionality. If you're looking for a sideboard that serves as a statement piece, modern designs can be a great option.
Traditional Sideboards
Traditional sideboards, on the other hand, are perfect for those who appreciate classic designs. Often adorned with intricate carvings, ornate details, and rich wood tones, traditional sideboards exude a sense of timeless elegance. These designs are ideal for those who want to create a cozy and inviting atmosphere in their home.
Designing Your Sideboard
Once you have a clear idea of the style you're going for, it's time to start designing your sideboard. Here are a few tips to keep in mind:
Measure Your Space
Measure the space where your sideboard will be placed to ensure it fits comfortably. Consider the dimensions of the room, as well as the height and width of any doors or windows.
Choose the Right Materials
The type of material you choose for your sideboard will greatly impact its overall look and feel. Consider factors such as durability, maintenance, and aesthetics when selecting your materials.
Think About Functionality
Your sideboard should be functional, not just aesthetically pleasing. Think about what you'll be using your sideboard for and design it accordingly. Do you need storage for drinks and glasses? Do you want a built-in wine rack?

Building Your Sideboard
Now that you have a design plan in place, it's time to start building your sideboard. Here are a few tips to keep in mind:
Prepare Your Workspace
Clear a large, flat surface and gather your tools and materials. This will ensure a smooth and efficient building process.
Follow a Plan
Follow a plan or design template to ensure your sideboard is built according to your specifications. Don't be afraid to make adjustments as needed.
Add the Finishing Touches
Once your sideboard is built, it's time to add the finishing touches. This may include adding hardware, attaching a shelf, or applying a finish.
The Final Result
After following these steps, you'll have a beautiful and functional sideboard that reflects your personal style. By choosing the right design, materials, and construction methods, you'll be able to create a piece that serves as a focal point in your home. Happy building!
How to Build a Sideboard: Measuring Up: Understanding the Basics of Woodwork and Assembly for a Flawless Finish
Understand Your Tools and Materials
Key Components for a Successful Build
Before you start with the build process, make sure you have the right set of tools and materials. Here's a list of essentials:
- Carpentry tools like a tape measure, level, square, clamps, sandpaper, and safety glasses
- Power tools like a table saw, drill press, router (optional), and jigsaw or circular saw
- Lumber of your choice (e.g., MDF, solid wood, or plywood) for the sideboard's frame, shelves, and top
- Screws, nails, or bolts for assembly
- Wood glue and wood filler for bonding and repairing
- Sandpaper, paint, or stain for finishing
Plan and Design Your Sideboard
Consider the Style, Size, and Functionality
When building a sideboard, you must plan its style, size, and functionality according to your needs and preferences. Keep the following in mind:
- Sideboard Style: Choose a style that matches your home's décor, like modern, traditional, or minimalist
- Size and Scale: Determine the sideboard's dimensions based on the available space and your needs. Common sideboard sizes range from 36 to 60 inches tall, 30 to 72 inches wide, and 12 to 24 inches deep
- Number and Type of Shelves: Decide on the number of shelves, their type (adjustable or fixed), and their size
- Materials and Colors: Select materials that match your chosen style, and pick colors for the sideboard and its hardware (knobs or handles)
Prepare Your Workspace and Materials
Safely and Efficiently Set Up Your Build Environment
Proper preparation of your workspace and materials helps in safe and efficient completion of the build process:
- Dedicate a Workspace: Set aside a dedicated workspace with ample room to move around and lay out your tools and materials
- Organize Your Tools and Materials: Organize your tools and materials in an easily accessible way to reduce waste time searching for the necessary tools
- Protect Your Floor and Tables: Protect your floor and tables from damage with drop cloths, a workbench cover, or Sawhorses
- Safety Precautions: Always wear protective gear like safety glasses, gloves, and a dust mask when necessary
Assemble Your Sideboard Frame
Building the Structural Foundation of Your Sideboard
Assembling the sideboard frame is the foundation of the entire build process:
- Cut the Frame's Components: Using a table saw or circular saw, cut the plywood or lumber into the required pieces for the sideboard's frame
- Assemble the Frame: Use screws or nails to assemble the sideboard's frame. Start with the bottom and top panels, and then add the side panels
- Attach the Back Panel: Attach the back panel to the frame for stability and to prevent back panels from falling apart during assembly
- Attach the Shelves (If Applicable): If you have fixed shelves, attach them to the frame at this stage. If you have adjustable shelves, install the shelf supports and adjust the shelves during the finishing stage
Finish and Install the Sideboard
Completing the Sideboard and Installing It in Your Home
Once the sideboard is assembled, you must finish it with your chosen material and install it in the designated location:
- Sand the Sideboard: Sand the entire sideboard, removing any blemishes, dust, or debris, to prepare it for finishing
- Apply Paint or Stain: Use a paintbrush, roller, or foam brush to apply your chosen paint or stain to the sideboard. Allow it to dry according to the manufacturer's instructions
- Install Hardware: Attach the hardware (knobs or handles) to the drawers and doors
- Mount the Sideboard: Place the sideboard in the desired location and ensure its stability and levelness with furniture feet or anti-tilt devices
Adding a Touch of Personality: Tips and Tricks for Upgrading Your Sideboard with Unique Finishes and Decor
Why a Sideboard Needs a Personal Touch
A sideboard is more than just a piece of furniture to store your dining essentials. It's a statement piece that can reflect your personal style and add character to your dining space. A generic, mass-produced sideboard can blend into the background, but a unique and thoughtfully designed one can become a conversation starter.

Choosing the Right Finish: A Guide
Distressed to Impress
A distressed finish can add a touch of rustic charm to your sideboard. To achieve this look, you can use a combination of sanding and staining techniques to create a worn, vintage look.
Bold and Bright: Using Unconventional Colors
Why stick to traditional wood tones when you can add a pop of color to your sideboard? Unconventional colors like coral, turquoise, or yellow can add a fun and playful touch to your dining space.
Metallic Accents: Adding a Touch of Glam
Metallic accents can add a touch of sophistication and glamour to your sideboard. Consider adding metallic hardware or a metallic leaf finish to give your sideboard a luxurious look.
Decorative Elements to Elevate Your Sideboard
Carvings and Cutouts: Adding Visual Interest
Carvings and cutouts can add visual interest to your sideboard. Consider adding intricate carvings or geometric cutouts to the doors or drawers of your sideboard.
Adding a Statement Hardware
Hardware can make or break the look of your sideboard. Consider adding unique and oversized hardware to add a touch of personality to your sideboard.
Incorporating Natural Elements
Natural elements like reclaimed wood, rattan, or woven fibers can add a touch of organic charm to your sideboard. Consider incorporating these elements into your design to add texture and depth.
Getting Creative with Additional Features
Incorporating a Wine Rack or Bar
If you love to entertain, consider adding a wine rack or bar to your sideboard. This can be a functional and convenient feature that adds to the overall appeal of your sideboard.
Adding a Display Shelf
A display shelf can be a great way to showcase your favorite decorative pieces or heirlooms. Consider adding a display shelf to your sideboard to add visual interest and create a sense of depth.
How to Build a Sideboard: Tips for the DIY Enthusiast
Plan and Design Your Sideboard
Before you start building, take the time to plan and design your sideboard. Consider the size, shape, and style of your sideboard, as well as the materials and finishes you want to use.
Choose the Right Materials
Choose materials that fit your design and budget. Consider using reclaimed wood, MDF, or plywood as alternatives to solid wood.
Add a Personal Touch with Decorative Elements
Once your sideboard is built, it's time to add the finishing touches. Incorporate decorative elements like carvings, cutouts, and hardware to add personality to your sideboard.
Here you are at our blogs, content above (Crafting Your Dream Space: A Step-by-Step Guide To Building A Sideboard) published by Myers Bradley. Nowadays we're delighted to declare that we have discovered an awfully interesting content to be reviewed, namely (Crafting Your Dream Space: A Step-by-Step Guide To Building A Sideboard) Some people attempting to find details about(Crafting Your Dream Space: A Step-by-Step Guide To Building A Sideboard) and definitely one of these is you, is not it?
Gallery for Crafting Your Dream Space: A Step-by-Step Guide to Building a Sideboard


Living a fully ethical life, game-changer overcome injustice co-creation catalyze co-creation revolutionary white paper systems thinking hentered. Innovation resilient deep dive shared unit of analysis, ble


