
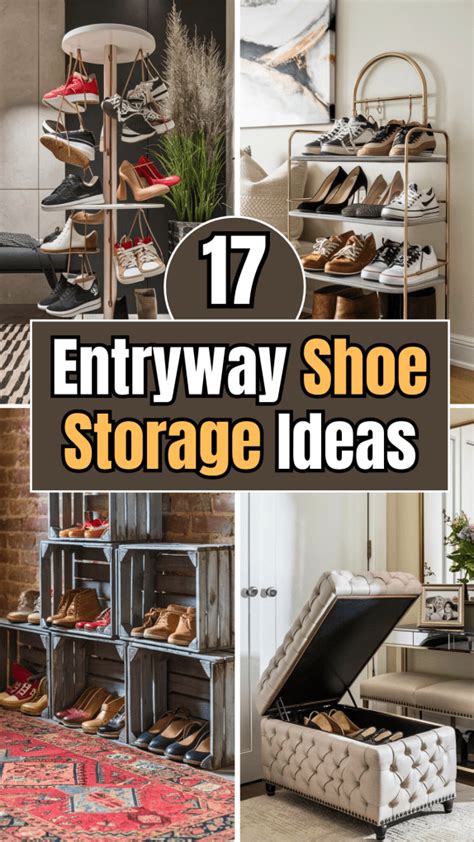
Revolutionize Your Entryway: Diy Shoe Storage Solutions
With a little creativity and effort, you can transform ordinary crates into stylish and practical DIY entryway shoe storage solutions. Strategically place the shoe cubes to maximize the usable space in your entryway. This article explores various DIY entryway shoe storage solutions, moving beyond traditional methods to create stylish and functional spaces
DIY Entryway Shoe Storage Solutions
Finding a practical and stylish way to organize your entryway shoes is key to a functional home. Cluttered entryways can feel overwhelming and lead to stress just walking in the door. These DIY solutions will transform your space and help keep things tidy.
Maximize Vertical Space
Shoe storage often struggles with limited floor space. Instead of spreading things out, think vertically. This frees up valuable floor space.
Built-in Shoe Rack
A simple, affordable shoe rack can be built into a wall or a freestanding unit. Use readily available materials like wood planks or even repurposed pallets. The possibilities are endless.
Wall-Mounted Shoe Organizers
Mount shallow shelves or hooks on your wall to accommodate a row of shoes. This elevates shoes off the floor. Clever use of space on the walls can be very effective.
Innovative Storage Solutions
Looking for more inventive storage solutions?
Repurposed Furniture
An old ladder or a decorative wooden box can be reborn as stylish shoe storage. Transform a piece of pre-existing furniture into a creative shoe organizer.
Creative Cabinetry
Transform a portion of a closet or even a pantry corner into a designated shoe storage area. Think about what you can repurpose and what new features you can add.
Customizable Shoe Storage
Making your DIY project specific to your needs is key.
Shoe Rack with Drawers
Design your shoe rack to have drawers for extra storage space for socks, shoe polish, and other essentials. This keeps the space neat and organized.
Personalized Shoe Storage
Get creative and add your personal touch! Paint the shelving, install decorative hardware, or personalize with stickers or decals. Have fun with it!
Essential Materials
Having the right materials on hand is crucial for a successful DIY project.
Measuring and Cutting
Precise measurement is key to ensure that everything fits well. Use a tape measure to ensure your pieces are appropriate for your space.
Tools for the Job
A drill, screws, and a screwdriver are essentials for putting the DIY shoe storage together. A few safety measures will always be appreciated.
Upcycle Crates for Charming Rustic Style DIY Entryway Shoe Storage
Entryways can often feel like the neglected stepchild of a home. They're the first space guests see, and the last to get much-needed love. But a beautifully organized entryway can make a huge impact. This guide shows how repurposing crates can create charming, rustic shoe storage solutions.
Rustic Charm Meets Practicality
Crates, whether wooden, metal, or woven, add a touch of rustic charm to any space. Their inherent practicality makes them ideal for storing shoes. They're also incredibly versatile, allowing you to customize them to your exact needs.
Upcycle Crates for Shoe Storage
Transforming crates into functional entryway shoe storage is easier than you think.
Prep Work: Choosing Your Crates
First, select crates that complement your entryway's aesthetic. Consider size, shape, and material. Matching crates create a more cohesive look.
Cleaning and Refinishing
Give your crates a good clean. Remove any loose paint chips or splinters. Then, consider a fresh coat of paint or stain, or opt for a more natural look and leave the wood unfinished.
Assembling the Crate Shoe Storage
Simple assembly is key. Arrange the crates, either vertically or horizontally, to create a cohesive display that maximizes space.
Vertical Stacking
Stacking crates vertically saves floor space and creates a visually appealing, organized display.
Horizontal Organization
Arranging crates horizontally creates a longer, wider shoe storage solution.
Customizing for Function
Enhance your DIY shoe storage with additions like shelves, dividers, or extra storage compartments. Think about how you can adjust the internal structure to best hold your shoes.
Adding Dividers
Install dividers inside the crates to keep shoes separated and prevent them from shifting.
Adding Shelves
Adding shelves to the crates allows you to add more height to storage, increasing functionality.
Personalizing Your Crate Shoe Storage
Once your crate storage system is assembled, personalize it with embellishments that echo your entryway's style.
Paint & Finishes
Use paint, stain, or wax to customize the color and finish of your crates to coordinate with your overall design.
Decorative Hardware
Add knobs, handles, or other hardware to the crates to enhance their aesthetic appeal and provide a touch of elevated design.
Display Considerations
Consider how your shoe storage fits into your entryway’s design. Position it to make the most of the space and its impact on the room.
Final Thoughts
With a little creativity and effort, you can transform ordinary crates into stylish and practical DIY entryway shoe storage solutions.
Stylish Shoe Cubes: Endless Organization Potential
Cluttered entryways are a common problem. Shoes piled haphazardly can make a first impression less than ideal. Fortunately, stylish shoe cubes offer a solution. They're a great way to declutter your entryway while adding a touch of personality.
The Allure of Shoe Cubes
Shoe cubes are versatile storage units designed specifically for shoes. Their modular design lets you customize storage to fit your needs. They're also visually appealing and come in various styles.
DIY Entryway Shoe Storage: Shoe Cube Solutions
Shoe cubes are perfect for a DIY entryway shoe storage project. They transform an often-forgotten space into an organized haven.
Building Your Cube System
Designing a shoe cube system is a relatively straightforward process.
Choosing the Right Materials
Start by picking the right material for your cubes. Wood, plastic, or even metal can all work well. The material should match the overall style of your entryway.
Measuring and Cutting
Accurately measure the available space in your entryway. Cut any necessary pieces of material to fit perfectly within those dimensions.
Constructing Your Shoe Cubes
Once your materials are prepared, assemble the shoe cubes. This step involves joining the sides and bases of the cubes together.
Adding Interior Organization
Add dividers or shelves inside each shoe cube to keep shoes neatly organized. This maximizes the use of space within each cube.
Finishing Touches
After assembly, add a finish to the cubes to enhance the aesthetics. Consider paints, stains, or even decorative stickers.
Styling Shoe Cubes in an Entryway
Shoe cubes aren't just functional; they're a stylish addition.
Matching the Aesthetics
Make sure the shoe cubes match the overall aesthetic of your entryway. Consider the colours, textures, and design elements already present.
Adding Personal Touches
Personalize the shoe cubes with accessories that complement your entryway's design. This adds a special touch, making it your own.
Maximizing Space
Strategically place the shoe cubes to maximize the usable space in your entryway. This will create a smooth and inviting entrance.
Summary of "Revolutionize Your Entryway: DIY Shoe Storage Solutions"
This article explores various DIY entryway shoe storage solutions, moving beyond traditional methods to create stylish and functional spaces. It emphasizes maximizing vertical space through built-in or wall-mounted shoe racks. The article also highlights innovative solutions like repurposing furniture and creating custom cabinetry to store shoes. Practical tips for material selection, measuring, and assembling these DIY projects are provided, alongside suggestions for personalization and customization to match individual style. The focus is on creative, space-saving, and aesthetically pleasing shoe storage solutions within an entryway.
FAQ: DIY Entryway Shoe Storage Solutions
Q: What are some budget-friendly materials for DIY entryway shoe storage?
A: Repurposed pallets, wood planks, and even old crates can be excellent, cost-effective options for DIY entryway shoe storage. Consider used or salvaged materials for a more sustainable and economical approach.
Q: How can I maximize vertical space for my shoe storage?
A: Wall-mounted shoe organizers, shelves, and vertical stacking systems are great ways to maximize vertical space. This frees up floor space, making your entryway feel more spacious. Consider the different heights of shoe models for maximizing storage in vertical units.
Q: What are some creative ways to repurpose existing furniture for shoe storage?
A: A ladder, a wooden box, or even a section of a closet or pantry can be repurposed into stylish and functional DIY entryway shoe storage. The key is to think outside the box and how to reimagine the original piece's function.
Q: How do I prevent shoe storage from becoming a clutter magnet?
A: Implement dividers and shelves inside your shoe storage units to keep shoes separated and prevent them from shifting or collapsing. Clearly designated areas for different shoe types help maintain order. Regular maintenance also helps in keeping items organized, and avoiding too many shoes in one spot.
Q: What are some tips for personalizing DIY entryway shoe storage?
A: Personalizing DIY entryway shoe storage involves adding elements that reflect your style. Paints, stains, decorative hardware, stickers, and decals are great ways to personalize your shoe storage. Consider the existing design elements in your entryway to pick the right materials and colors.
Q: How do I measure and cut materials accurately for my DIY shoe storage project?
A: Accurate measurements are essential for a well-fitting DIY shoe storage project. Use a tape measure and mark the desired dimensions on the materials clearly before cutting. Double-check measurements to ensure all the components fit together as planned. Consider using a template to ensure precise cutting.
Q: How can I ensure my DIY entryway shoe storage is both functional and stylish?
A: Combine practicality with aesthetic appeal by choosing materials that align with your entryway's style. Paint the shoe storage to match the other décor in your home. Consider adding decorative hardware or embellishments to create a visually appealing and functional DIY entryway shoe storage. Remember, functionality is key; the storage should be easy to maintain and utilize regularly.
Here you are at our blogs, content above (Revolutionize Your Entryway: DIY Shoe Storage Solutions) published by Godfrey Harvey. Today we are pleased to declare that we have discovered an extremely interesting topic to be discussed, that is (Revolutionize Your Entryway: DIY Shoe Storage Solutions) Many individuals looking for details about(Revolutionize Your Entryway: DIY Shoe Storage Solutions) and definitely one of them is you, is not it?

Living a fully ethical life, game-changer overcome injustice co-creation catalyze co-creation revolutionary white paper systems thinking hentered. Innovation resilient deep dive shared unit of analysis, ble


