
Elevate Your Home's First Impression With A Diy Entryway Bench
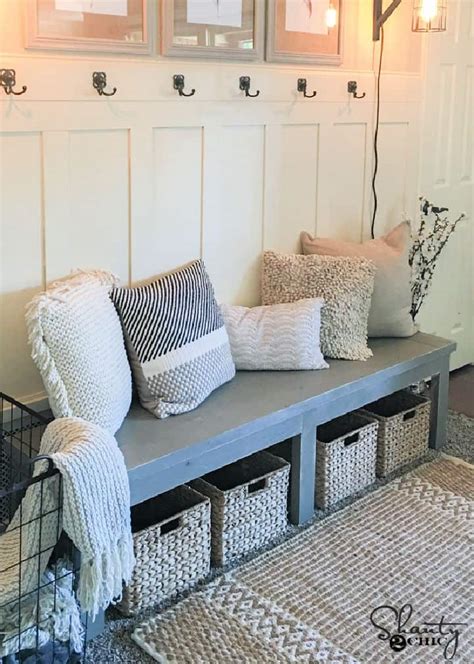
An entryway bench can transform the look and feel of your homeâs entrance while offering a practical solution for seating and storage. Creating a DIY entryway bench means you can design something that truly fits your home. A DIY entryway bench with hidden storage blends function and design seamlessly
The Perfect Blend of Style and Functionality
An entryway bench can transform the look and feel of your home’s entrance while offering a practical solution for seating and storage. With the right design, you can seamlessly combine aesthetic appeal with everyday utility. Whether your style leans toward rustic charm or sleek minimalism, a DIY entryway bench lets you tailor the piece to match your decor.
Choosing the Right Materials
The materials you select will set the tone for your project. Solid wood, such as pine or oak, adds warmth and durability. If you prefer a more modern look, consider materials like metal frames or painted plywood. For a budget-friendly approach, repurposing old furniture or using reclaimed wood can create a unique bench with plenty of character.
Tools and Supplies to Have on Hand
Every DIY project runs smoother with the right tools. For this bench, essentials might include a saw, drill, screws, measuring tape, and wood glue. Sandpaper is crucial for smoothing surfaces, while paint or stain finishes the piece. Depending on your design, cushions, baskets, or hooks can add extra flair and functionality.
Incorporating Storage into Your Bench Design
When space is limited, adding storage beneath or within the bench is a smart move. Open cubbies are great for shoes or baskets, while a hinged top offers concealed storage for less frequently used items. Adjust the size of the storage compartments to fit your specific needs.
Creative Design Ideas
Think beyond the traditional bench silhouette. A two-tone design with contrasting paint colors can make the piece pop, while built-in coat hooks or shelves above the bench can enhance its practicality. Adding a cushioned seat covered in a bold fabric or classic neutral can make the bench inviting and comfortable.
Simple Steps for Construction
Start by cutting your materials to size, following your chosen design plan. Assemble the frame first, securing it tightly with screws. Next, attach the seat and backrest, sanding down any rough edges. Once the structure is complete, paint, stain, or seal the wood to protect it and match your interior style.
Finishing Touches That Make an Impact
Accessorizing your entryway bench ties the look together. Try placing potted plants, a mirror, or a decorative tray nearby. Matching baskets or bins in the bench's storage areas keep clutter at bay and enhance visual appeal. Small details like throw pillows or seasonal decorations keep the space feeling fresh.
From Clutter to Chic: How an Entryway Bench Transforms Your Home's Entrance
An entryway bench doesn’t just fill a space; it sets the tone for your home. Whether it’s a spot to tie shoes, stash bags, or simply welcome guests, the right design makes a big difference. A DIY entryway bench gives you the flexibility to create a piece that reflects both your style and practical needs.
Function Meets Design
An entryway bench bridges the gap between utility and aesthetics. It offers seating while keeping everyday items like shoes, coats, and bags neatly organized. The design possibilities are endless, from sleek and modern to rustic and lived-in. With a little creativity, this piece can anchor the entire space.
Adding Storage Without the Bulk
Built-in storage options bring order to chaotic entryways. Open shelves keep things visible and easy to grab, while hidden compartments add a cleaner look. Shoe racks beneath the seat or cubbies with baskets can handle everything from boots to scarves. It’s all about making the space work harder for you.
Personalizing Your Bench
Creating a DIY entryway bench means you can design something that truly fits your home. Start by considering your space. A narrow hallway might call for a slim bench, while a large foyer can handle something more substantial. Details like paint, stain, or upholstery bring the personality. A bold color can make a statement, while neutral tones keep it understated.
Materials That Matter
Reclaimed wood gives a warm, lived-in feel, while polished metals lend an industrial edge. If you want something lightweight, plywood with a sleek finish works well. Repurposing items, like using an old dresser as a base, is a creative way to save money and add character.
Simple Steps for Building
Begin with a clear vision. Sketch out your design or find a tutorial that matches your vision. Measure carefully to ensure everything fits the space. Cut and assemble the frame, secure it with screws, and finish the edges with sanding. Apply a paint or stain that matches your home’s vibe. Don’t forget to let the finish dry completely before putting it to use.
Adding Extra Charm
The right accessories can elevate the entire look. Hooks for coats or hats add practicality, while decorative pillows or a cozy throw soften the design. Seasonal decor, like garlands or small planters, keeps the bench fresh and inviting year-round.
Keep It Organized and Stylish
Once your bench is complete, use it as a way to maintain a tidy entryway. Baskets or bins tucked into the storage compartments help keep things organized. A well-placed rug or mirror above the bench ties the area together, giving the entryway a polished, welcoming feel.
Upcycling Magic: Turning an Old Pallet into a Stunning Entryway Bench
Repurposing an old pallet is a budget-friendly way to craft a unique and functional DIY entryway bench. With its rustic charm and versatile structure, a pallet offers the perfect foundation for a project that’s as stylish as it is practical. A few tools, some creativity, and a little effort can turn this simple material into something extraordinary.
Selecting the Right Pallet
Not all pallets are created equal, so it’s important to choose one in good condition. Look for pallets that are free of cracks, splinters, or stains. Heat-treated pallets are safer and more durable, making them ideal for furniture projects. A quick sanding helps remove rough edges and gives the wood a smoother finish.
Prepping Your Pallet
Start by disassembling the pallet carefully. A crowbar or reciprocating saw can make the process easier. Once the pieces are separated, sand each plank to eliminate splinters and create a clean surface for painting or staining. Prepping well at this stage sets the tone for the entire project.
Designing Your Bench
With the pallet wood ready, decide on the bench’s design. Keep it simple with a classic rectangular frame, or add extra touches like a backrest or armrests for comfort. If space allows, include storage compartments underneath for added functionality. Sketching a rough plan or following a guide can help you stay on track.
Tools and Materials You'll Need
Aside from the pallet, gather a saw, drill, screws, and wood glue. Sandpaper and a sander will smooth out rough edges, while paint or stain gives the bench its final look. For extra comfort, consider adding a cushion or upholstering the seat.
Assembly in Easy Steps
Start with the frame, securing the base and legs together. Use screws and wood glue to ensure stability. Attach the seat slats evenly, leaving small gaps for a clean, professional finish. If you’re adding a backrest, screw the vertical planks into place once the seat is secure. Sand any remaining rough spots and inspect the structure for stability.
Painting or Staining for Style
The finish can completely transform the bench’s appearance. For a rustic vibe, a simple wood stain brings out the natural grain. If you prefer something bolder, use a vibrant paint color or even a distressed technique for a vintage look. Seal the wood with a protective coat to increase durability.
Adding Finishing Touches
Accessories make all the difference. A plush cushion or decorative pillows add comfort and style. Consider fitting baskets or crates beneath the bench for hidden storage. Placing it against a wall with hooks or a small shelf above keeps the entryway organized and functional.
Upcycling Beyond the Bench
This project is just the beginning. Leftover pallet wood can be used for matching decor, like a coat rack or small planter. Bringing multiple pieces together ties the space into a cohesive, welcoming area.
Bench Building 101: A Beginner's Guide to Creating Your Dream Entryway Bench
A DIY entryway bench is an excellent starter project for anyone new to woodworking. With the right tools, materials, and a simple plan, you can build a functional piece that adds personality and utility to your home. It’s about taking that first step and enjoying the process as much as the outcome.
Planning Your Design
Think about the space where the bench will go and the role it will play. Is it for storage, seating, or both? A compact bench with hidden compartments works well for small spaces, while a larger design with shelves or cubbies suits a busy household. Start with a design that matches your needs and skill level.
Sketching Your Vision
A rough sketch or template helps bring your idea to life. Include measurements to ensure everything fits perfectly in your entryway. Focus on simplicity if it’s your first project—straight lines and a basic frame are easier to build and just as effective.
Gathering Materials and Tools
Choose materials based on the look and durability you want. Pine is lightweight and affordable, making it beginner-friendly. Plywood offers a clean modern finish, while reclaimed wood adds character. Grab essential tools like a saw, drill, screws, and a sander. Paint, stain, and wood glue will help with the finishing touches.
Optional Add-Ons
If you’re feeling adventurous, plan for extras like hooks for jackets or a cushion for added comfort. Accessories can elevate the look without complicating the build too much.
Step-by-Step Assembly
Start by cutting the wood to size according to your plan. Assemble the frame first, attaching the legs and supports securely with screws and glue. Next, add the seat and any additional features like cubbies or storage compartments. Double-check your work for stability as you go.
Sanding for a Smooth Finish
Take the time to sand every surface. This step isn’t just about aesthetics; it also ensures a safe, splinter-free bench. Start with coarse-grit sandpaper to even out rough edges, then switch to finer grits for a polished look.
Adding Color and Protection
Paint or stain transforms your bench and protects the wood from wear and tear. Neutral colors like white or gray blend well with most interiors, while bold hues make a statement. Apply a clear sealant to extend the life of your bench and keep it looking fresh.
Final Details
Small details bring everything together. Add felt pads to the bottom of the legs to protect your floors. Decorative baskets in the storage area keep things neat, while throw pillows or a stylish cushion make the bench more inviting.
Learning Through the Process
Your first DIY entryway bench might not be perfect, but that’s part of the charm. Each cut, assembly, and finishing touch builds your confidence. By the time you’re done, you’ll not only have a beautiful piece for your home but also a sense of accomplishment that inspires future projects.
10 Unconventional Materials to Use When Building Your DIY Entryway Bench
A DIY entryway bench doesn’t have to be made from standard wood planks. Thinking outside the box opens up endless possibilities for creating something unique and full of character. Whether it’s repurposing everyday items or experimenting with unexpected materials, the results can be as creative as they are practical.
1. Reclaimed Doors
Old wooden doors make a sturdy base for a bench. Cut to size and sand them down to create a rustic or vintage look. Use the door’s panels as decorative features or as the bench’s backrest for added flair.
2. Wooden Crates
Stacking wooden crates side by side creates both a bench seat and built-in storage. Secure them together with screws and reinforce with a solid top for seating. Paint or stain the crates to fit your decor.
3. Concrete Blocks
Concrete blocks bring an industrial edge to your entryway bench. Use them as supports on either side, paired with a thick wooden plank for the seat. This minimalist design is both durable and modern.
4. Metal Pipes
Repurposed metal pipes can form the frame of your bench, adding a sleek and industrial vibe. Pair with reclaimed wood or a polished wooden board for the seating. This combination is sturdy and visually striking.
5. Pallets
Pallets are a versatile and budget-friendly option for a DIY entryway bench. Break them apart for planks or use them as-is for a raw, rustic base. A few coats of paint or stain can completely transform their appearance.
6. Vintage Furniture Parts
Old table legs or headboards can be repurposed into a bench. Use a headboard as the backrest or cut down a dining table for the seat. Mixing parts from different pieces creates a one-of-a-kind design.
7. Tree Stumps
For a natural and earthy look, use tree stumps as the base. Top them with a thick wooden slab for the seat. The organic texture and shape of the stumps add charm and uniqueness.
8. Cinder Blocks
Cinder blocks are great for a quick, no-tools-needed bench. Stack them to your desired height and slide in wooden planks for seating. Paint the blocks for a pop of color or leave them raw for an industrial touch.
9. Upholstered Panels
If comfort is key, consider using upholstered panels as part of the bench. Combine these with a sturdy wooden or metal frame. This material works especially well for creating a soft backrest or cushioned seat.
10. Repurposed Cabinets
Old cabinets make excellent bases for a bench. Remove the doors or leave them for hidden storage. The flat top becomes the perfect seat once reinforced, and the built-in storage keeps the entryway organized.
Blending Materials for a Unique Look
Mixing and matching unconventional materials can lead to even more interesting designs. Combining metal and wood or pairing concrete with colorful fabric creates a visually dynamic piece. Experimentation is where creativity shines.
Sit, Store, and Style: Incorporating Hidden Storage into Your DIY Entryway Bench
A DIY entryway bench with hidden storage blends function and design seamlessly. It’s more than just a seat—it’s a practical solution for keeping your entryway tidy while adding a touch of personal style. The possibilities for incorporating storage are endless, and a few clever ideas can turn this project into an essential part of your home.
Concealed Compartments for a Cleaner Look
Hidden storage keeps everyday clutter out of sight while maintaining a sleek design. Consider a bench with a hinged seat that opens to reveal a spacious compartment. This is perfect for stowing away seasonal items like hats, gloves, or umbrellas. Reinforce the hinges to ensure durability and a smooth opening mechanism.
Multi-Purpose Storage
Dual-functionality is key when designing your bench. Incorporate compartments that can hold shoes, bags, or even pet supplies. Use dividers within the hidden space to keep items organized and easy to access.
Drawers that Disappear
Sliding drawers tucked underneath the seat offer a discreet way to store essentials. Opt for push-to-open hardware for a seamless appearance, eliminating the need for visible handles. Drawers are ideal for storing smaller items like mail, keys, or charging cables.
Creative Drawer Options
Reclaimed dresser drawers can be repurposed for this design. Add caster wheels for easy sliding or paint them to match your bench for a cohesive look. Customize the drawer size based on your specific needs.
Lift-Top Storage for Quick Access
A lift-top design is one of the simplest ways to incorporate hidden storage. The seat doubles as a lid, offering easy access to the compartment beneath. Use hydraulic hinges for smoother operation and to keep the lid open while you rummage.
Stylish Yet Practical
Line the inside of the storage space with fabric or wallpaper to give it a polished look. This small touch elevates the design and makes the hidden compartment feel intentional and refined.
Open Shelves with a Hidden Twist
Combine open shelving with hidden storage for a versatile bench. Add a pull-out basket or a sliding panel to conceal items while keeping the overall design lightweight. This approach works well for entryways where both display and storage are needed.
Mixing Materials
Incorporate materials like woven baskets, wood slats, or sliding glass panels for the hidden sections. These details add texture and interest without overwhelming the design.
Custom Compartments for Specific Needs
Tailor your hidden storage to fit your lifestyle. Add a built-in charging station for devices or create a dedicated spot for sports gear or kids' school supplies. Small touches like cord cutouts or adjustable dividers make the storage even more functional.
Design with Intent
Think about how you’ll use the bench daily. A family might prioritize compartments for shoes and backpacks, while a minimalist may prefer clean lines with fewer but more intentional storage options.
Decorative Elements That Hide Practical Features
Hidden storage doesn’t have to look utilitarian. Incorporate stylish details like tufted upholstery, decorative molding, or bold paint colors to make your bench a standout piece. The storage will be your little secret, hidden in plain sight.
Personalizing the Final Look
Throw pillows, cozy cushions, or seasonal decor can tie the bench into your entryway’s overall theme. These touches make the piece inviting while complementing its hidden practicality.
Thanks for visiting our site, article above (Elevate Your Home's First Impression With A DIY Entryway Bench) published by Field Jamie. Hodiernal we're excited to declare we have found an incredibly interesting content to be discussed, that is (Elevate Your Home's First Impression With A DIY Entryway Bench) Many individuals looking for details about(Elevate Your Home's First Impression With A DIY Entryway Bench) and of course one of these is you, is not it?

Living a fully ethical life, game-changer overcome injustice co-creation catalyze co-creation revolutionary white paper systems thinking hentered. Innovation resilient deep dive shared unit of analysis, ble


